Introduction to Programs
Programs are a great way of structuring an overall education path to drive further learning. This involves organizing a series of courses that must be completed in order to fulfill a curriculum or compliance training.
Programs group courses to support a linear or conditional progression through them, and can include completion dates and time frames for enrolled learners to complete each stage of the program. Customised messages and reminders can also be configured to be automatically sent to enrolled learners and their managers.
Creating a New Program
1. Go to Site Administration > Programs.
2. Click the Add a New Program button. You will then be redirected to the Create New Program page.

3. Select which course category your program will belong in from the Category drop-down menu.
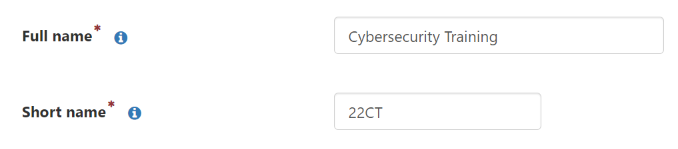
4. Enter the Program Name into the Full Name field, and a corresponding Short Name into the Short Name field.
5. If necessary, enable Available From and Available Until dates.
Enabling an Available From date will result in the program being visible to learners on the specified date. Enabling an Available Until date will result in learners being unable to access the program after a specified date.

6. If necessary, you can also add a Summary to provide learners with a program description, and an Endnote to be displayed once the learner completes the program.
7. Under the Audience-Based Visibility section, use the Visibility drop-down menu to determine which audience groups can see the program.
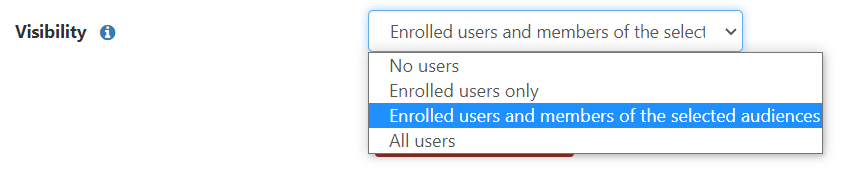
If 'Enrolled users and members of the selected audiences' option has been selected, then additional audiences can be selected by clicking on Add Visible Audiences.
8. Under the Appearance section, select a program icon and upload a program image if necessary.
 TIP
TIP
The program image will be used as the primary image in the Lambda Store, with the option to add additional images once the program is synchronised into the Store. Click here if you would like to learn more about preparing your programs for sale.
9. Once you are complete, click Save Changes.
Editing Your Program
When a program is first created, it is not initially live for learners to see. There are still other settings that need to be configured before learners can be enrolled. After you first finish creating your program, you will be redirected to the editing page. There are five other tabs for you to edit.
Once one or more learners are enrolled, then the certification will become live.

Editing Overview: Content
The Content tab shows any set of courses or competencies within the program. Adding sets of courses or competencies creates the program's learning path. Once multiple sets have been created, set dividers are employed to allow the creation of sequences or dependencies between each set.
1. Using the 'Add...' drop-down menu, select whether you would like to add a set of courses or a recurring course to your program. Once this has been selected, click Add.

Sets of Courses
2. Select the necessary courses for your first course set, then click OK.
3. Your first course set will then appear listed on the page as an 'Untitled Set.'
Enter an appropriate course set name into the Set Name field.

In the Learner Must Complete drop-down menu, select the amount of courses that a learner must finish to complete the set.
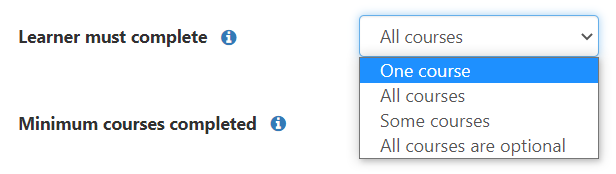
Selecting Some Courses will prompt you to fill in the Minimum Courses Completed field and select an option from the Course Score Field drop-down menu.
In the Minimum Time Required section, determine the minimum time required for a learner to realistically complete the course set.

4. Once you are complete editing your first course set, you can add another one by clicking Add.
5. Once you have multiple course sets, you can change the way that they are arranged to be completed through using two options:
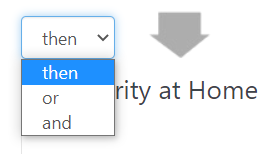
In between each course set, you can select whether learners complete the following set alongside the provide one, subsequently after the previous one, or in whichever manner they choose by using the 'Then...' drop-down menu.
At the upper right-corner of each course set section, you can determine how course sets are arranged by clicking either Move Up or Move Down. If you would like to remove a particular course set, you can also click Delete.

6. Once you are complete, click Save Changes.
Recurring Course
2. Using the Add Course Menu, navigate through the different course categories to locate your desired course, or search for the specific course title.
3. Once you have selected your recurring course, click OK.
4. Your recurring course will then appear listed as "Recurring Course Set."
Enter an appropriate course set name into the Set Name field.

In the Minimum Time Required section, determine the minimum time required for a learner to realistically complete the recurring course.

Using the corresponding Recurrence settings, determine how often learners will have to redo the course. Then, using the corresponding Course Creation settings, determine when the original course is copied to be completed again.

5. Once you are complete, click Save Changes.
Editing Overview: Messages
The Messages tab is used to create automated messages that can be emailed to all learners assigned to a program. An optional message for managers of each assigned learner can also be added, depending on the message type selected.
1. In the 'Add...' drop-down menu, select your desired message type and click Add.
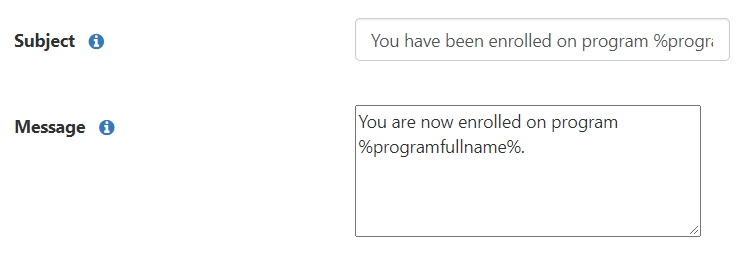
Enrolment: To be sent to the learner when they are assigned to the program.
Exceptions Report: To be sent to site administrators when there are new exceptions on the program.
Un-Enrolment: To be sent to the learner if they are unenrolled from the program.
Program Due: To be sent to the learner a set period of time before they are due to complete the program.
Program Overdue: To be sent to the learner when the program completion date has passed.
Program Completed: To be sent to the learner when they complete the program.
Course Set Due: To be sent a set period of time before the current course set is due.
Course Set Overdue: To be sent a set period of time after the current course set is due.
Course Set Completed: To be sent whenever a course set is completed.
Learner Follow-Up: To be sent to a learner a set period of time after they have completed the program.
2. Create an appropriate subject line and add your desired text for your message.
3. If necessary, enable Send Notification to Manager to send an additional notification to the learner's manager. You can also create a separate subject line and text for this message. If a learner has multiple job assignments with more than one manager, the message will be sent to all managers.
 NOTE
NOTE
This feature is only available for the Scale plan and for those who have Direct Access to Lambda Learn, and requires an HR Import setup.
4. Once you are complete, click Save Changes.
Editing Overview: Completion
The Completion tab allows you to manage and edit a learner's progression through a program. If enabled, you have the ability to complete many tasks, such as:
- Manually change a learner's current completion record.
- Add, edit, or delete program history for learners, even if they are no longer assigned.
- View a full audit trail of all changes made to a learner's program completion records.
- Identify any program records that contain problems.
To edit or amend a particular learner's program completion record:
1. Find your desired learner, and click on the corresponding Edit Completion Record link.
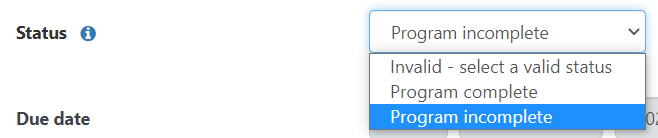
2. If you would like to amend a learner's current completion status, select a new status from the Status drop-down menu.
3. If you would like to set a new program due date, first enable a new due date and click the calendar icon to set a new due date and time.

4. Once you are complete, click Save Changes.
5. Scroll down and example the Completion History section if you would like to add or amend a learner's completion history.
Click Add History to amend the learner's program completion date.
Click on the cog icon to edit a particular record, or click on the delete icon to remove it.
Editing Overview: Assignments
NOTE
The Assignments feature is only available on the Scale plan and for those who have Direct Access to Lambda Learn. Creating organisations, positions, or audiences will also require an HR Import Setup.
Learners can also be assigned into programs through purchasing them in the Lambda Store.
The Assignments tab is used to select learners who will need to complete the program. Learners can be assigned manually. Once learners are assigned to a program, they will be provided access to enrol in each selected course.
Assigning by Individual Learners
1. In the 'Add...' drop-down menu, select Individuals. Then, click Add.
2. Click Add Individuals to Program.
3. Browse through all the learners available in the system, or search for a specific one. Click on the learner name to include them under Items to Add.
4. Once you have selected your desired learners, click OK.
Assignment Due Date
Once you have assigned a group of learners to your program, you must also assign a due date. The due date for learners enrolled in the program must be set using a fixed completion date, or using a time relative to a specified event.
An Assignment Due Date will be assigned to other learners as they join the group. The actual due date cannot be changed if the learner has already completed the program. Learners' actual due dates may differ for various reasons.
To set an assigned due date:
1. Find your desired learner or learner grouping, and click on the icon under Due Date Settings.
2. On the Completion Criteria page, select whether you would like a Fixed Completion Date or Set [a] Time Relative to Event.
Fixed Completion Date: Click on the Calendar Icon and set a date and time. Once you are complete, click on Set Fixed Completion Date.
Set [a] Time Relative to Event: Select an event from the drop-down menu and set an appropriate time span. Once you are complete, click on Set Time Relative to Event.

3. Once you are complete, click Save Changes.
TIP
Click here if you would like to learn more about selling Programs on the Lambda Store.
Comments
Article is closed for comments.