Featured Links Block
The Featured Links block allows you to set up a visual navigation system on the home page, profile pages, or course pages of your Totara site. With the use of tiles, you can use images with headers to guide learners to internal Totara pages, such as courses or external pages.
 Associating Images With Your Course, Program, or Certification
You can add an image to your course, program, or certification in the newly revised 'Appearance' section. This image will populate a featured links tile when you add this course to the block.
Likewise, you can add images to programs or certifications by going to the 'Details' tab and uploading an image in the 'Appearance' section.
 Featured Links on Your Dashboard
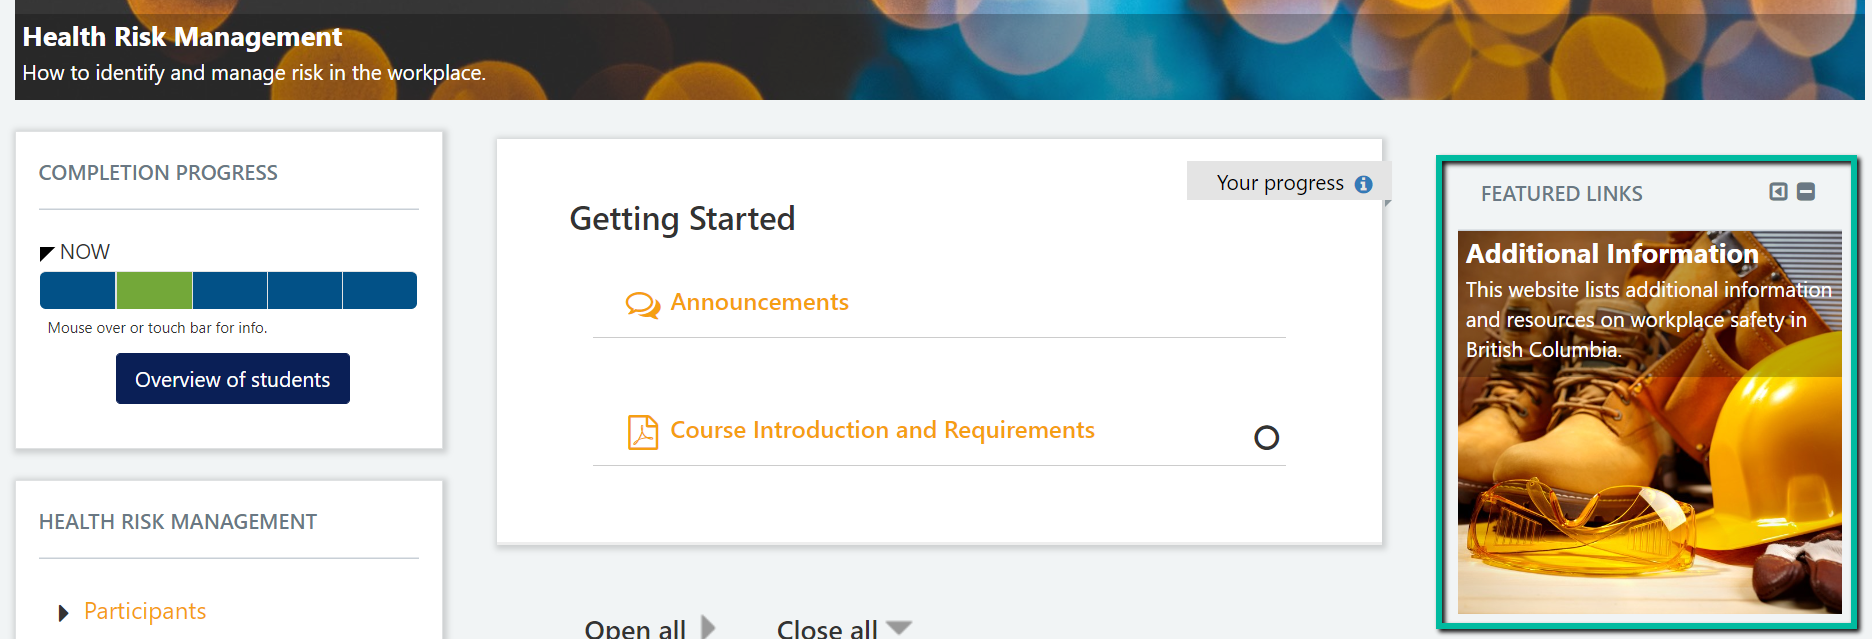
The featured links block offers a modern and enticing way of seeing available or assigned courses on dashboards. Instead of using lists, you can now show off your courses using tiles.
 Different Emphasis With Different Styles
The featured links block allows you to set up multiple options that best fits your dashboard. You can choose from static tiles with a single URL, tiles focusing on specific courses, programs, or certifications, or a rotating set of gallery tiles. You can add headers and descriptions, choose different tile sizes, and add multiple blocks to one page.
 Audience-Based Visibility
If you are using audience-based visibility, then you can add featured links blocks to generic dashboards or to your front page. People who are able to see this course will be able to see the block.
Creating a Featured Links Block
1. Go to the desired page that you wish to add a featured link block to.
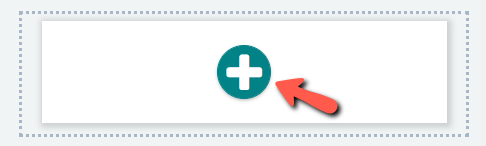
2. Turn editing on, and select the 'Add Block' icon in your desired block region.
3. Select the 'Featured Links' option.
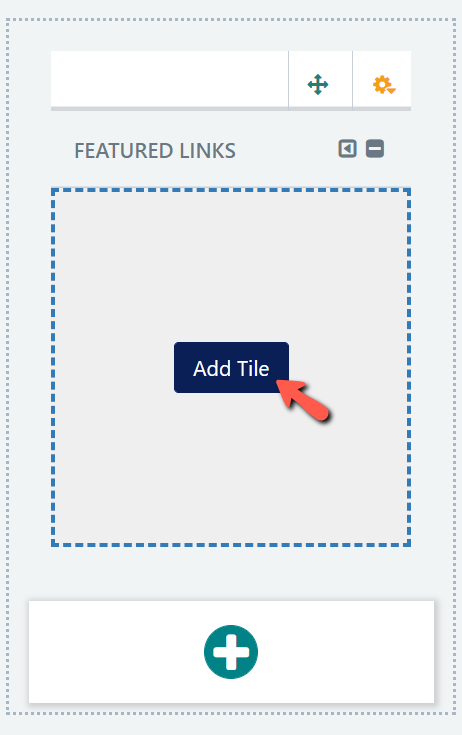
4. Within the featured links block, click the 'Add Tile' button.
5. Select an appropriate Tile type from the drop-down menu.
Static Tile: Enable a single URL to be linked to an image or solid customizable background colour.
Gallery Tile: Enable a single URL to be linked to multiple images that are switched at a defined interval. The solid background colour will only be visible when an image with a transparent background is used.
Course Tile: Creates a link to a single course to be added to the tile. The pre-existing course image will be used as the background.
Program Tile: Creates a link to a specific program. After you select this option, you will see a 'Select program' button. The pre-existing program image will be used as the background.
Certification Tile: Creates a link to a specific certification. After you select this type, you will see a 'Select certification' option. The pre-existing certification image will be used as the background.
6. Select the position of tile in the overall order of tiles in the block on the 'Position of the tile' field. The numbers available in this field represent the overall number of tiles on the block.
For example, electing 1 would make it the first tile, and selecting 3 would make it the third tile.

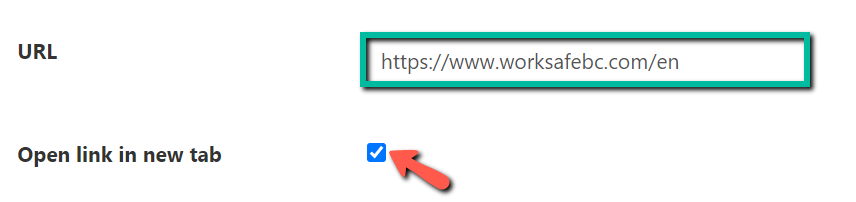
7. Add a necessary link for your tile to direct users to. This could be done through including a URL, or selecting a course, program, or certification.
If you are including a URL, select whether or not the link will open on a new page.
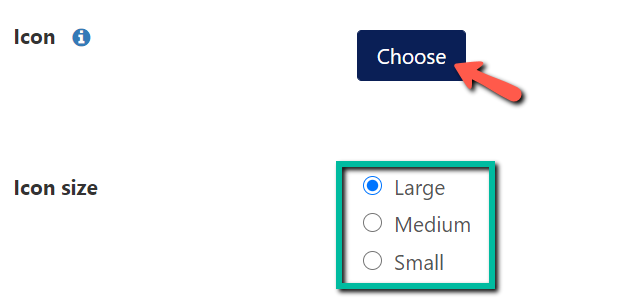
8. If you would like to include an icon instead of a background photo, you can click the 'Choose' button and select one from the menu, and determine its size on the tile.
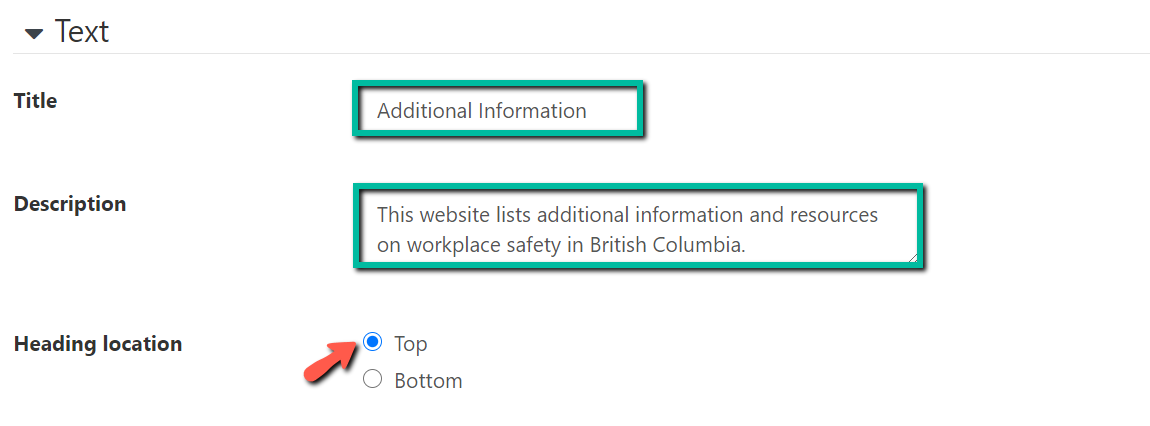
9. Scroll down and expand the 'Text' section. Include a header title, description, and heading location for your tile.
10. Scroll down and expand the 'Background' section.
Upload an appropriate image to the 'Image' field.
Add an alternate text if the background image cannot load.
Select a background colour.

11. Once you are complete, click Save Changes at the bottom of the screen.

Now you have successfully added a featured links block to your page.
Comments
Article is closed for comments.