Introduction to Pages
Pages can be used to include text, images, blocks, and widgets and create layouts to help sell products to your customers. The process of adding a new page to your store is the same for any type of page you would like to create. When you are finished creating your page, it can be added to the store navigation, linked to other pages or the footer of your store, or used as a new home page.
 NOTE
NOTE
When adding or editing pages on your site, ensure that you are careful as any changes will be reflected on your production site. When trying out new pages and layouts, we recommend that you do not delete any existing pages in case you would like to revert to your original layout.
Additionally, consider the legibility of your page by both search engines and customers, especially when you are selecting the page title and URL, and when composing the meta data and content.
Creating a Page
1. On the Lambda Store admin panel, navigate to Content > Elements > Pages.
2. Click Add New Page.
3. Under the General section, configure the following settings.
Enable Page: If you would like to first test your page view, we suggest initially disabling the page until you are satisfied with its appearance.
Page Title: Enter an appropriate page title.
4. Expand the Content section, and configure the following settings.
Content Heading: Enter the heading that you would like to appear at the top of the page.
Content Editor: Complete and format the desired text as necessary. Click Show/Hide Editor to insert widgets, images, and variables.
 TIP
TIP
If you are proficient in HTML, you can also format the page using this language after clicking the Show/Hide Editor.
5. Expand the Search Engine Optimization section, and configure the following settings.
URL Key: Either keep the default URL, or enter another one.
Meta Title: Enter an appropriate meta title, which should be less than seventy characters in length. This will appear in the browser title bar and tab.
Meta Keywords: Enter a selection of appropriate keywords that search engines can use to index the page. Separate multiple words with a comma.
Meta Description: Enter a brief description of the page that will be shown on the search results listings. Ideally, this will be 150-160 characters in length, with a maximum limit of 255 characters.
TIP
Click here if you would like to learn more about implementing Search Engine Optimization best practices in your store.
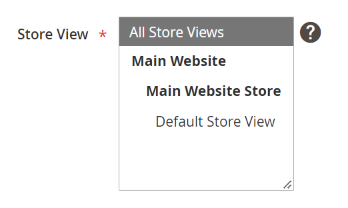
6. Expand the Page in Websites section, and select each website the page is available.
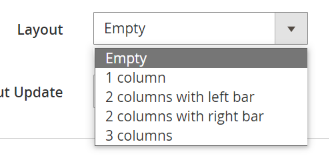
7. Expand the Design section, and configure the following settings.
Layout: If necessary, select an appropriate column layout.
8. Expand the Custom Design Update, and configure the following settings if necessary.
To and From: To schedule a design change, use the calendar to select the dates for this change to take effect.
New Theme: To apply a different theme to the page, select it from the drop-down menu.
New Layout: To apply a different layout to the page, select it from the drop-down menu.
9. Once you are complete, click Save.
Previewing a Page
1. On the Lambda Store admin panel, navigate to Content > Elements > Pages.
2. After locating your desired page, click on the corresponding Select link under the Action column and select View.
3. To return to the grid, click Back. If you have initially disabled the page and are satisfied with the preview, you can click on the Page name and enable it.
NOTE
If you have created and previewed a new home page that you would like to be used, please inform the Lambda Support team so that we can update the store settings.
Additionally, after creating or updating any page that you would like to be used, please inform the Lambda Support team so that we can update the index and page cache.
Adding Site-Wide Blocks to a Page
If you have created any Pre-Made Blocks for your site, they can easily be added to store pages through using the CMS Static Widget.
To add pre-made blocks to your page:
1. On the Lambda Store admin panel, navigate to Content > Elements > Pages.
2. Click Add New Page.
3. Under the General section, configure the following settings.
Enable Page: If you would like to initially test your page view, we suggest initially disabling the page until you are satisfied with its appearance.
Page Title: Enter an appropriate page title.
4. Expand the Content section, and configure the following settings.
Content Heading: Enter the heading that you would like to appear at the top of the page.
Content Editor: Click Show/Hide Editor, and then click Insert Widget.
5. In the Insert Widget page, configure the following settings.
Widget Type: Select the CMS Static Type.
Block: Click the Select Block button, and select your desired block from the list.
Once you are complete, click Insert Widget.
6. After configuring the rest of the page settings, click Save.
Standard Page Layouts
| One Column | This layout can be used to create an eye-catching home page with a large image or focal point. One column layouts can also be useful as a landing page, or for pages that have combinations of text, images, and video. |
| Two Columns with Left Bar | This layout can be used for pages with navigation on the left side, like catalogs or search result pages with layered navigation. This can also be used for home pages that need additional navigation or blocks of supporting content on the left. |
| Two Columns with Right Bar | This layout is large enough for eye-catching images or banners in the main content area, and can be used for product pages with blocks of supporting content on the right. |
| Three Columns | This layout has the centre column that is wide enough for the main text of the page, with room on each side for additional navigation and blocks of supporting content. |
Adding Widgets to Pages
Page-specific Widgets can be created when using the Content Editor. Widget types include:
| Type | Description |
| CMS Page Link | Displays a link to a specific CMS page. Allows you to specify custom text and title. When the link is complete, it can be used in content pages and blocks. |
| CMS Static Block | Displays blocks that contain static information, such as text, images, and embedded videos. |
| Catalog Category Link | Displays either an inline or block-style link to a selected catalog category. When the link is complete, it can be used in content pages and blocks. |
| Catalog New Products List | Displays a block of products which have been designated as new, for the duration of time specified in the product record. |
| Catalog Product Link | Displays either an inline or block-style link to a selected catalog product. When the link is complete, it can be used in content pages and blocks. |
| Catalog Products List | Displays a list of products from the catalog. |
| Lambda Banner | Displays a welcome banner that includes a title text, banner text, and search bar. |
| Lambda Showcase | Displays a rotating list of featured products that you would like to showcase. |
| Lambda Subscription Block | Displays a newsletter subscription block for customers to enter their email addresses into. |
| Orders and Returns | Gives guests the ability to check the status of their orders and submit requests to return merchandise. The widget appears only for guests and customers who are not logged into their accounts. |
| Recently Compared Products | Displays the block of recently compared products. You can specify the number of products included, and format them as a list or product grid. |
| Recently Viewed Products | Displays the block of recently viewed products. You can specify the number of products included and format them as a list of product grid. |
Comments
Article is closed for comments.